Step by step guide to make a DIY wreath this Christmas
Posted on 2nd December 2021
It’s beginning to look a lot like Christmas!
While we still have a few more sleeps until Santa Claus comes down the chimney, we are thinking all things decorative here at Venture.
We always say that when selling your home, it is important for the exterior of your property to make a good impression – after all it is the first thing viewers see. That’s no different this time of year, so why not make your very own show-stopping wreath to hang on your door?
We’ve put together everything you need to know for your next DIY project.

What you will need
Firstly, you need a round base to add your foliage and decorations to.
These are available to buy online and in stores, but, if you want to go into full DIY mode, you could use:
- wire molded into a circle
- a wire coat hanger (which will be perfect for hanging on your door)
- cardboard cut into shape
- long, thin flexible twigs from the garden
Next, you need foliage; whether it’s fresh or faux really doesn’t matter, as long as it will fill and cover your base. If you really want to get into the Christmas spirit, you could even use tinsel.
What you use to decorate your wreath is personal choice, but you could use pine cones, berries, flowers, dried fruit, cinnamon sticks, ribbon and much more.
Depending on your design, having scissors, gloves, glue and garden wire or twine close by will be handy.
How-to guide
After gathering what your foliage, decorations and craft essentials, it’s time to start decorating.
Step one:
Add a loop to your circle base which will be used to hang the wreath from your front door. You could use ribbon, thin wire or twine.
This can be long or short, depending on your preference and the design you have in mind.
Step two:
Take your foliage and begin to twist or secure it around the base. Tie or glue any foliage that doesn’t seem secure.
Position the foliage outwards to give the wreath a full and voluminous look.
Make sure the base is completely covered.

Step three:
Start adding decorations, such as leaves and moss. Moss works really well at bulking out the wreath.
You could even add some flowers to inject colour and brighten up the greenery. Secure these with glue.
Step four:
It’s now time to add pine cones to give your wreath a real Winter look.
Attach these by using glue or wrap wire around the bottom of the pine cone, slipping the wire around the last layer. Make sure there is wire left to secure to the wreath.
Evenly attach the pine cones to the wreath, leaving room for the next step.
Step five:
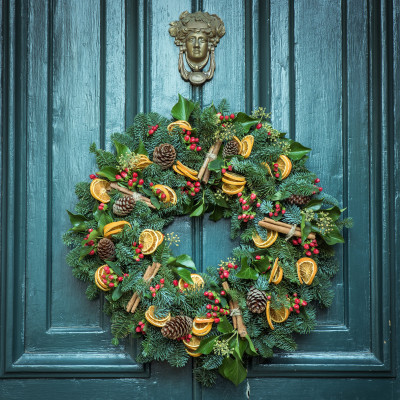
In between the pine cones, add your berries. We recommend red berries because they look stunning with the greenery and will match Santa’s suit perfectly.

Step six:
Now add any final decorations you have gathered such as ribbons, cinnamon sticks and dried apple slices in sparse areas.
Step seven:
The most challenging step yet. Pick up your wreath to see if any decorations are not properly attached.
If any fall off, don’t worry, you can attach them using lots of glue or wire. After all, your wreath is going to experience cold and windy weather so it’s best to make sure now everything is secure.
And voila, you have made your very own beautiful wreath which is ready to hang on your door for all to see and admire.
You have your step-by-step guide, now it’s over to you. Share a picture of your Christmas wreath with us on Twitter, @ventureprop.